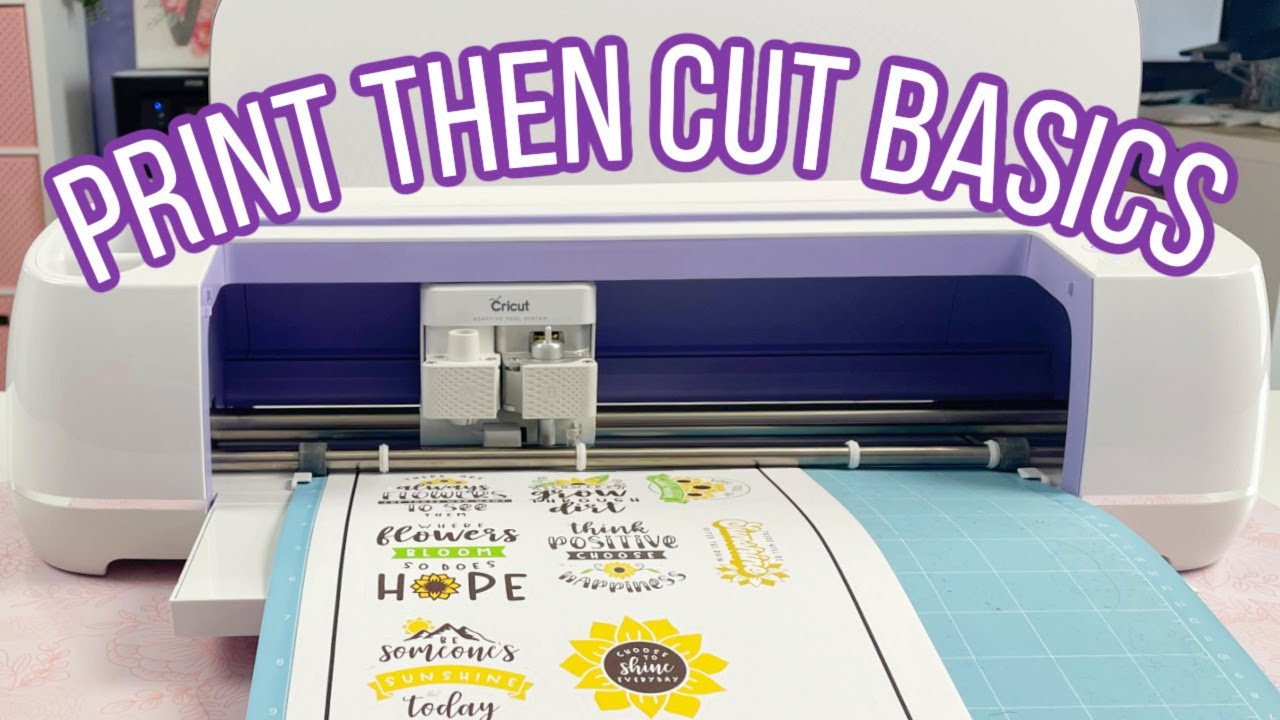
42 how to make print and cut labels on cricut
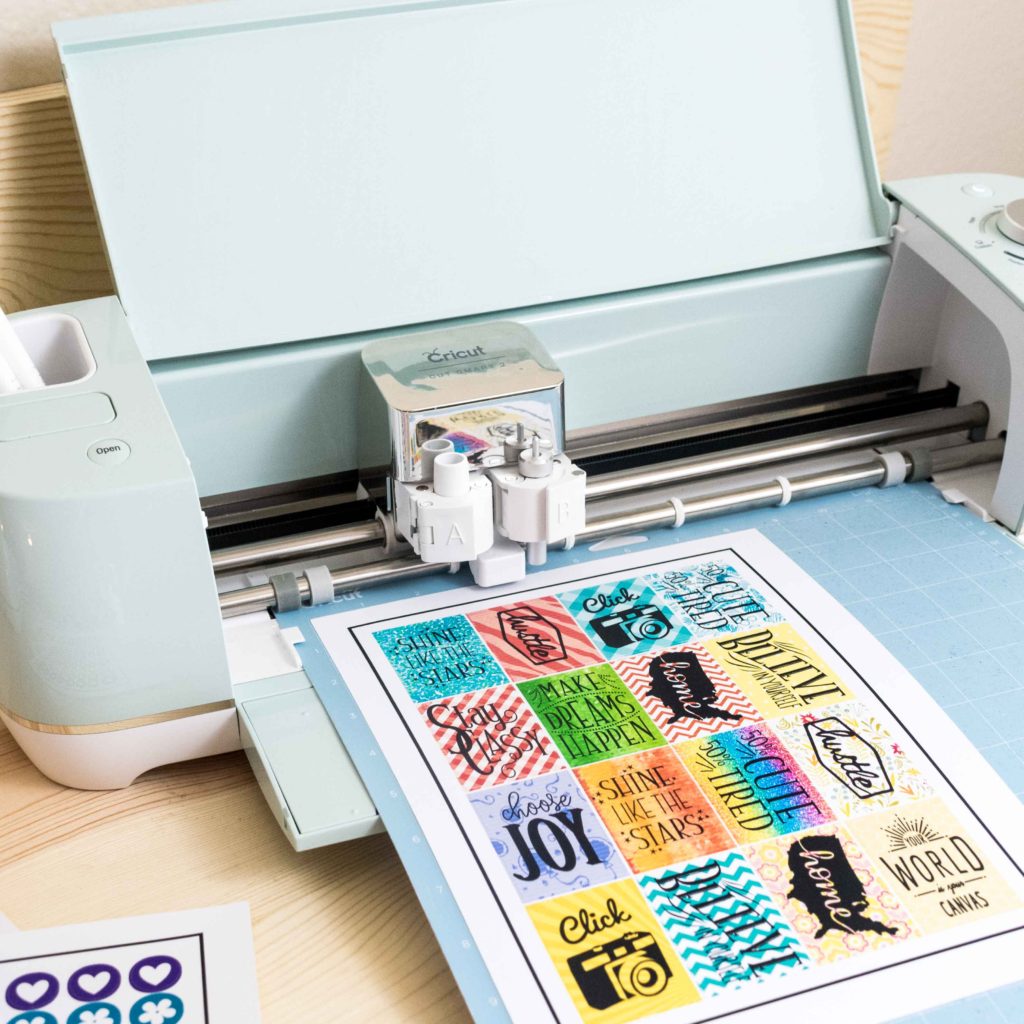
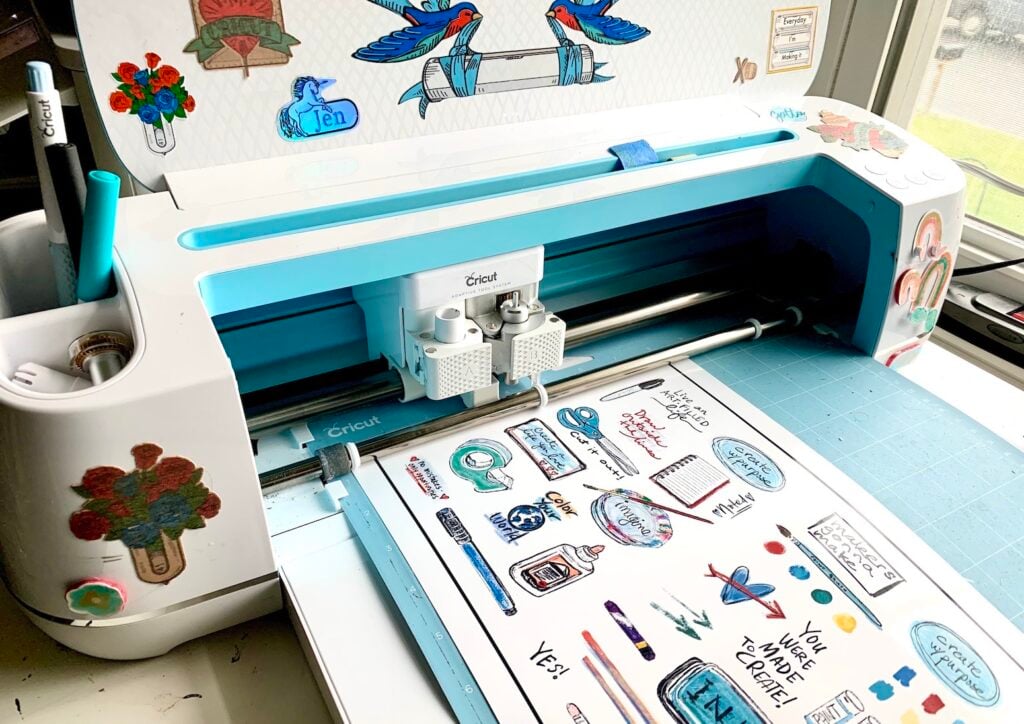
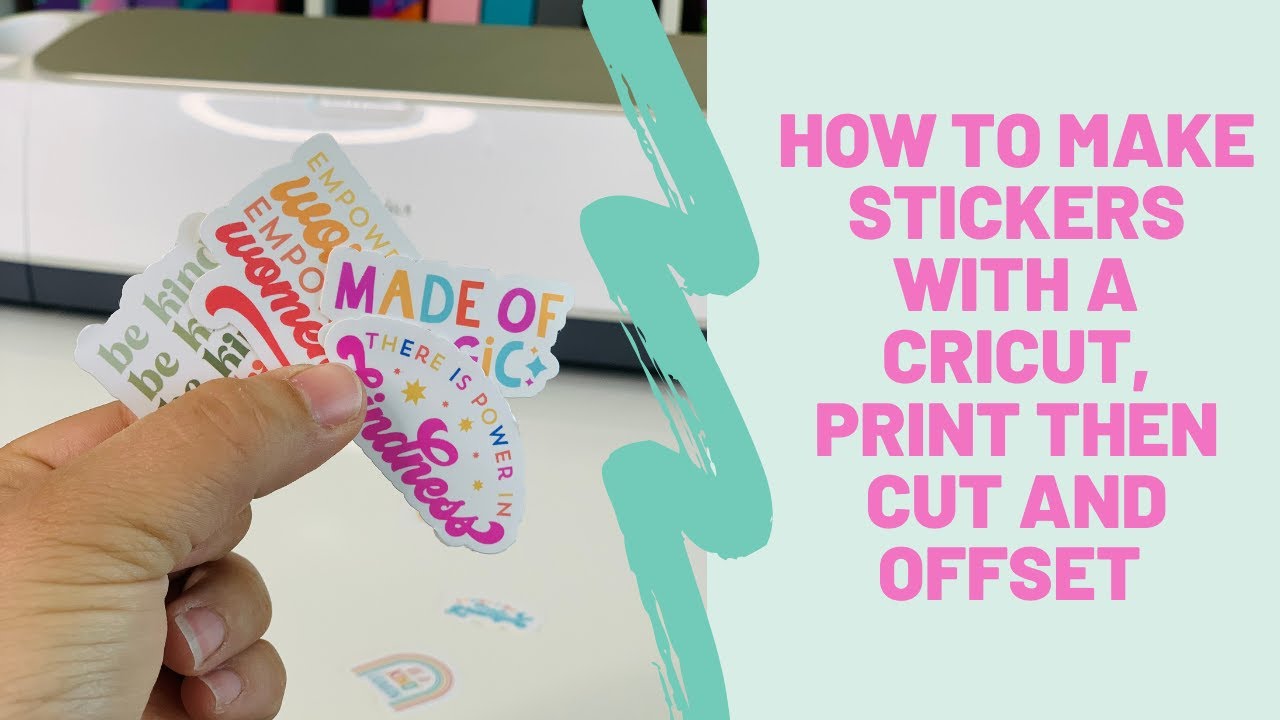
How To Make Fabric Quilt Labels With The Cricut Maker - Sewing Machine Fun How to Cut Quilt Labels with the Cricut Maker 1. Create a Quilt Label Image 2. Create a Print Then Cut Image in Cricut Design Space 3. Print on Fusible Fabric Paper 4. Cut the Printable Fabric with the Cricut 5. Iron On The Label Making Quilt Labels with Other Cutting Machines Final Notes Heat Transfer Vinyl vs. Printed Fabric Labels Print & Cut Label Tutorial in Cricut Design Space Take the printed page with the black border and place it on your mat. Load it in the machine with the "arrow" button, and Press the "C" button to start the print and cut. When the images are cut, remove the mat and you will have beautiful stickers. Please let me know if you have any questions or if one of the steps is not clear.
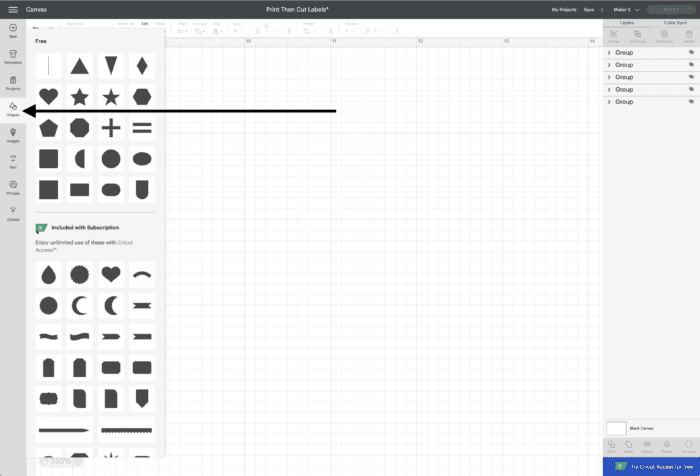
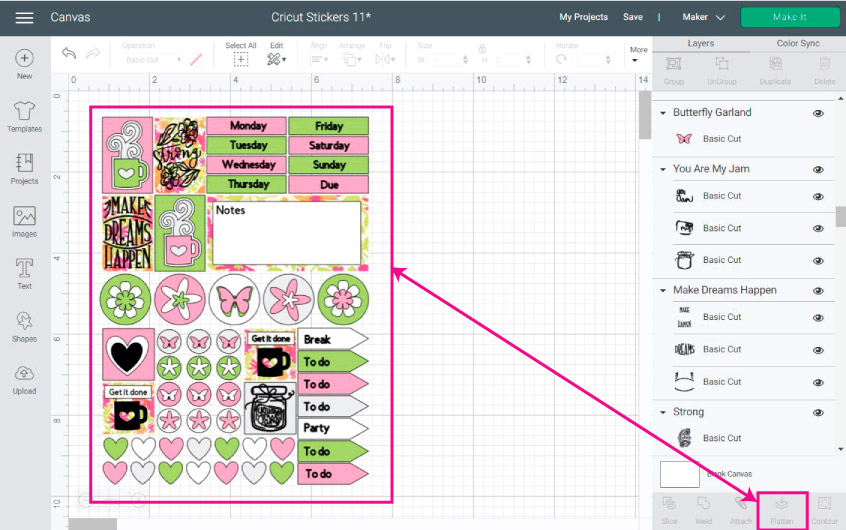
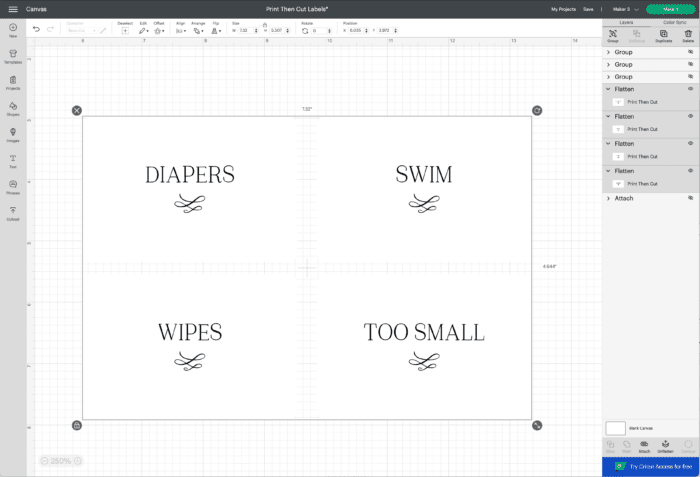
Printable Labels with Print then Cut on Your Cricut Machine Click flatten in the lower right-hand corner to make this a print then cut label and it is ready for your machine! Be sure to delete any labels you don't want to use before continuing. Step 3: Making Printable Decorative Labels with Print Then Cut Now it is time to use print then cut to actually make our printable labels.
How to make print and cut labels on cricut
Kitchen Labels, How To Print And Cut On Cricut - Extraordinary Chaos A Few Tips For Using Cricut Print And Cut. Decide on the best paper to print on, I prefer printable printable vinyl sheets to sticker paper. Vinyl is thinner and produces a better overall effect. Calibrate your printer before using with you Cricut, this will save so much time and effort. Load your paper the correct way into the printer. Cricut Print Then Cut - Tips and Tricks - Shawn Mosch Just click on the box that I circled in blue in the image below to change the color. Now we are going to start to change these from cutting images to print then cut images. First, right next to where you changed the color of the label to white, click on the Fill and change that from No Fill to Print. Once you do that, look at the layers panel ... Complete Print Then Cut Cricut Guide - How to Make Stickers and More ... When you want to Print then Cut something using your Cricut machine, it's key to setup the design correctly in Design Space. There are two things that you must make sure you do: You must switch the "Operation" option to "Print then Cut >> Standard" itch setting from "cut" 2. Then you need to click "Flatten" on the bottom right.
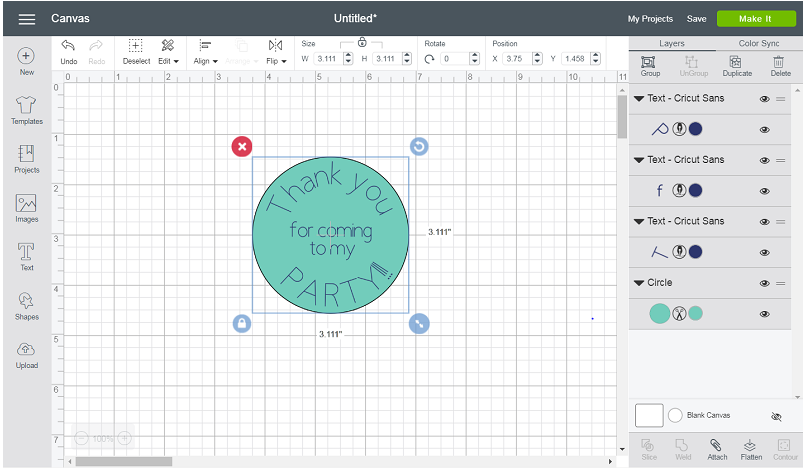
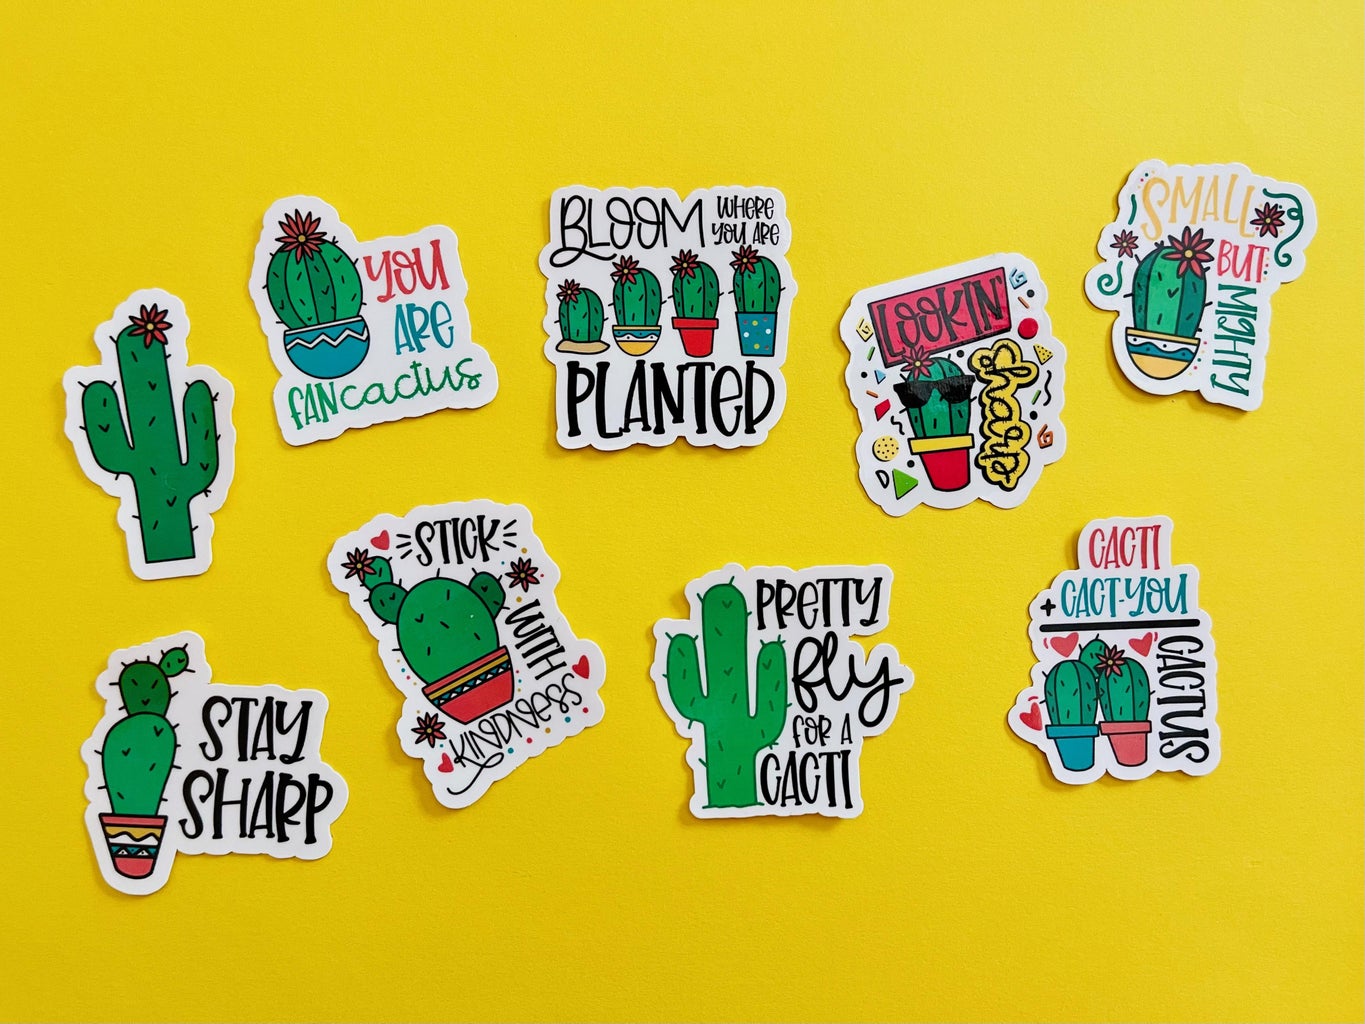
How to make print and cut labels on cricut. How to Print and Cut Round Stickers on the Cricut Go to Design Space at Click New Project Click the Upload button Browse, find, and upload the sticker file On the next screen, under "Select Image Type," choose Simple then click Continue. On the next screen, just click Continue. On the next screen, keep it selected as "Save as print then cut image" then click Save. Easy Print then Cut Stickers with Cricut | Design Bundles Start by pressing the green Make It button on the upper right hand corner of the screen. This will start the cutting process and take you to another page. Step 18 - Continue to next page Click the Green Continue button on the lower right-hand corner of your screen. Step 19 - Send to Printer Click on the green Send to printer button. Step 20 - Print 3 Ways To Make Labels With Your Cricut - YouTube It's a lot easier than you may think, and in this video, Rachel shows three different ways you can make labels with your Cricut. From drawing to print then cut, labels can be made easily and with... How to Print and Cut with Your Cricut - Cut Your Own Stickers! - SVG Nation First, upload your photo using the instructions above on uploading a JPG image for print and cut. When your photo uploads, it is already set as a print and cut image and is ready to go. You can use the steps above to create a border for your picture. Or, you can change the shape of your photo by slicing your image.
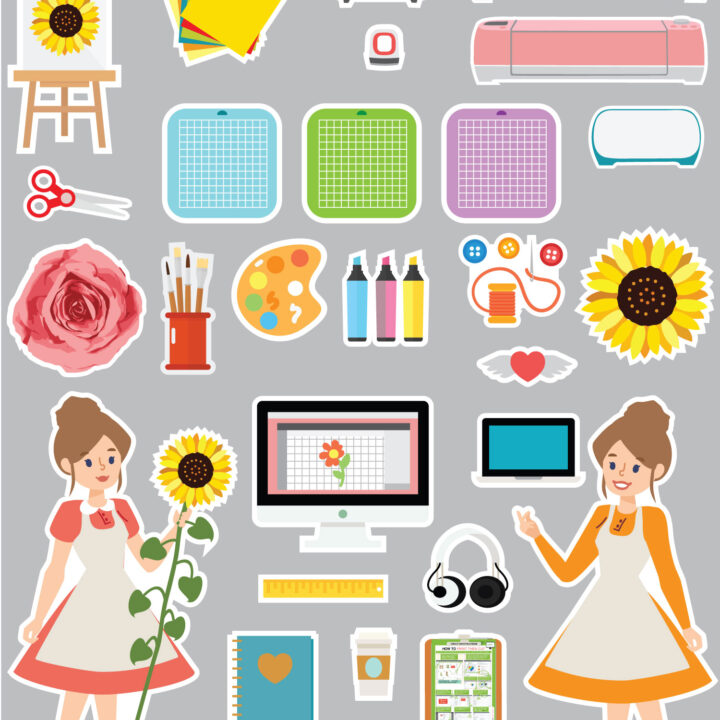
Online Labels® Sticker Paper Cut Settings for Cricut Maker Online Labels Updated 09/22/2022 • ~1 minute read We've tested the new Cricut Maker™ with OnlineLabels.com sticker paper to bring you our recommended cut settings for each material. Continue to the chart below to find the cut settings for kiss cut and full cut stickers. Materials were tested on a Cricut Maker with the fine-point blade. How to Make Vinyl Labels with a Cricut Cutting Machine Label Project in Cricut Design Space. Step 2- Create your design. If you are using a Cricut machine, you can find my exact project in Cricut Design Space here. To design my labels, I used a Cricut font called Balega Std Regular. I measured the bins I was labeling to figure out the best size, and I ended up using 55 pt font for my project. How To Make Stickers And Decals With Cricut - Organized-ish You can use the grid lines and image size box on the top toolbar to make your decal design the exact size you need. When your design is ready, click the Make It button and follow the on-screen instructions for aligning your vinyl (either on a mat or right into the machine for Smart Vinyl). Let your machine do all the work while you grab snacks. How To Make Labels With Cricut - A Getting Started Guide To make vinyl labels on a Cricut machine, here's what you need: A Cricut Machine - You can use Cricut Maker, Cricut Explore or Cricut Joy Premium Fine-Point Blade - this is the blade that comes with your machine Vinyl - All types of vinyl will follow the same process including permanent vinyl, removable vinyl, glitter, foil, etc.
How to Use Cricut Pens to Make (Gorgeous) Custom Labels Step 1 - Pick a Label Design. When designing a label, you need to start with a label shape. This is the outline the Cricut machine will cut out and that your text will sit on top of. When using printable products (like Avery labels) or a label maker, you are often limited by size and shape. How to Organize Your Space and Make Labels with Cricut First, open Cricut Design Space App and figure out what font you want to use for your project. You can get really creative here depending on what your organizing. Then design your label size. This will vary from container to container designing on the sizes you are using. I made ones that said cheese, snacks, drinks, etc. Next cut labels. How to Make Print then Cut Stickers in Cricut Design Space Create the sentiment. Search images for "Happy Holidays.". Select the image, and click "Insert Images.". This image has a shadow layer, but it is hidden by default. Click the eye to unhide it. Then resize the image to fit the sticker. Insert personalized text. Click on the Text button to create a text box. Select a font, and type in the ... How to Make Vinyl Labels with a Cricut | A Comprehensive Guide Start by opening Cricut Design Space and use the search bar in the Image Library to find pictures for everything you want to label. Select images that are both simple in design and intuitive to understand. Notice the three images I selected below are not single color/layer images when I first place them on my canvas.
Cricut Print Then Cut Stickers Tutorial | Sweet Red Poppy
Address Labels with Cricut - Crafting in the Rain Print then cut address labels. Start by creating a rectangle that's 2.8 inches wide by .8 inches tall. Type 3 separate text lines. The first is your name. The second and third are your address. By keeping them as separate lines, they will be easier to space properly. Choose a font for your name. Feel free to make your name a different font ...

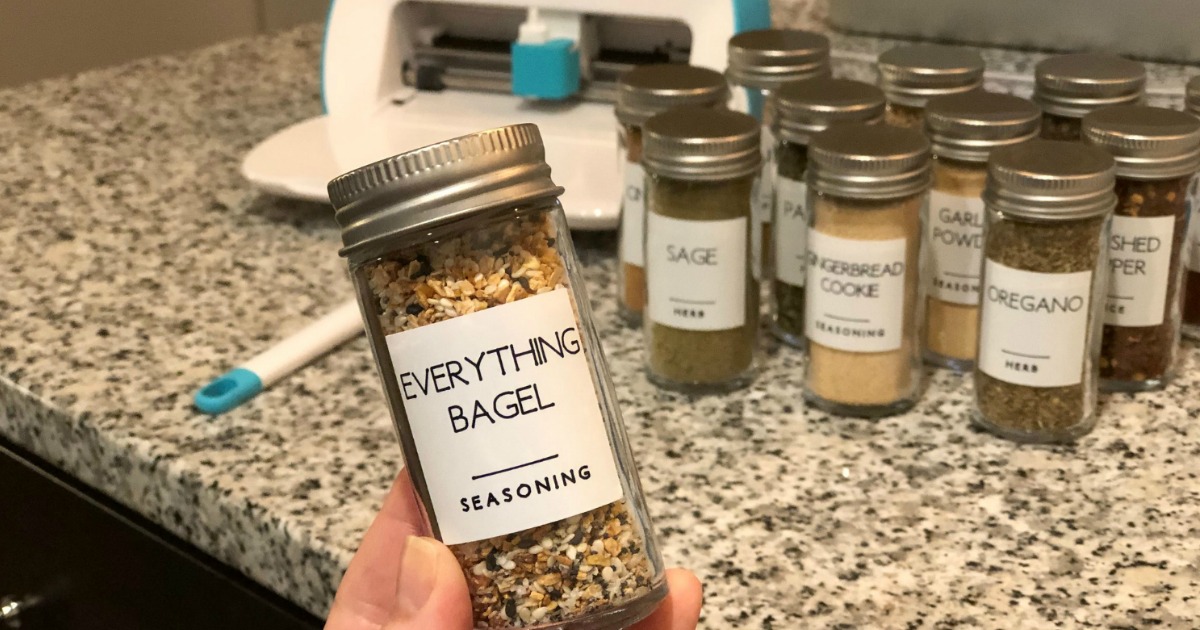
Easy Cricut Printable Spice Jar Labels | The Country Chic Cottage
How to make vinyl stickers with Cricut - Cricut Click "Make it" in the upper right corner and follow the prompts on the software and machine through the cutting process. Once done cutting, the machine will indicate that it's time to unload the vinyl and weed the design. Weeding is simply a term used to describe removing excess vinyl from around the sticker's design.

How to make sticky labels using Cricut | The Font Bundles Blog
How to make labels with Cricut - Cricut Make labels with Cricut Step 1 To design from scratch, click "New Project" on the home page of Cricut Design Space. Step 2 Once on the canvas, on the left-hand navigation bar, you'll see an option for "Images." Step 3 Click that button. You'll now be able to search in the Cricut image library!

How to Make Stickers with Cricut "Print then Cut" - Sarah Maker
A Guide To Making Labels with Cricut Print Then Cut Your Cricut machine will first scan the registration marks (the black rectangle) around your labels, and then cut out the shapes with precision! Step 5: Apply Your Labels Once you remove the excess paper around your labels, you can simply peel them off the mat or paper backing (if using sticker paper) and place them wherever you need them!

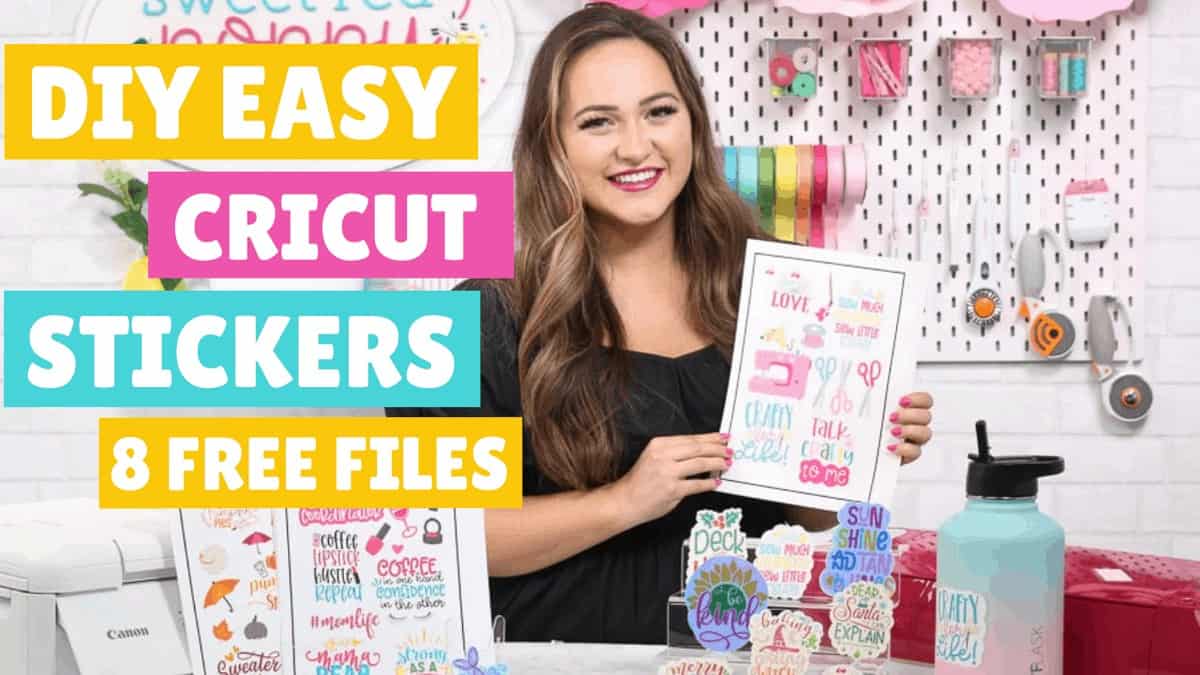
How to make Print and Cut Stickers: + 11 FREE Sticker ...
How do I Print Then Cut in Design Space? - Help Center Print the page using your home printer, then place the paper on the Cricut cutting mat and feed it to the Cricut machine. The machine will scan for the sensor marking then cut around the image with precision. Note: The maximum image size for Print Then Cut is 9.25" x 6.75" and the default material is 8.5" x 11". This cannot be changed at this time.
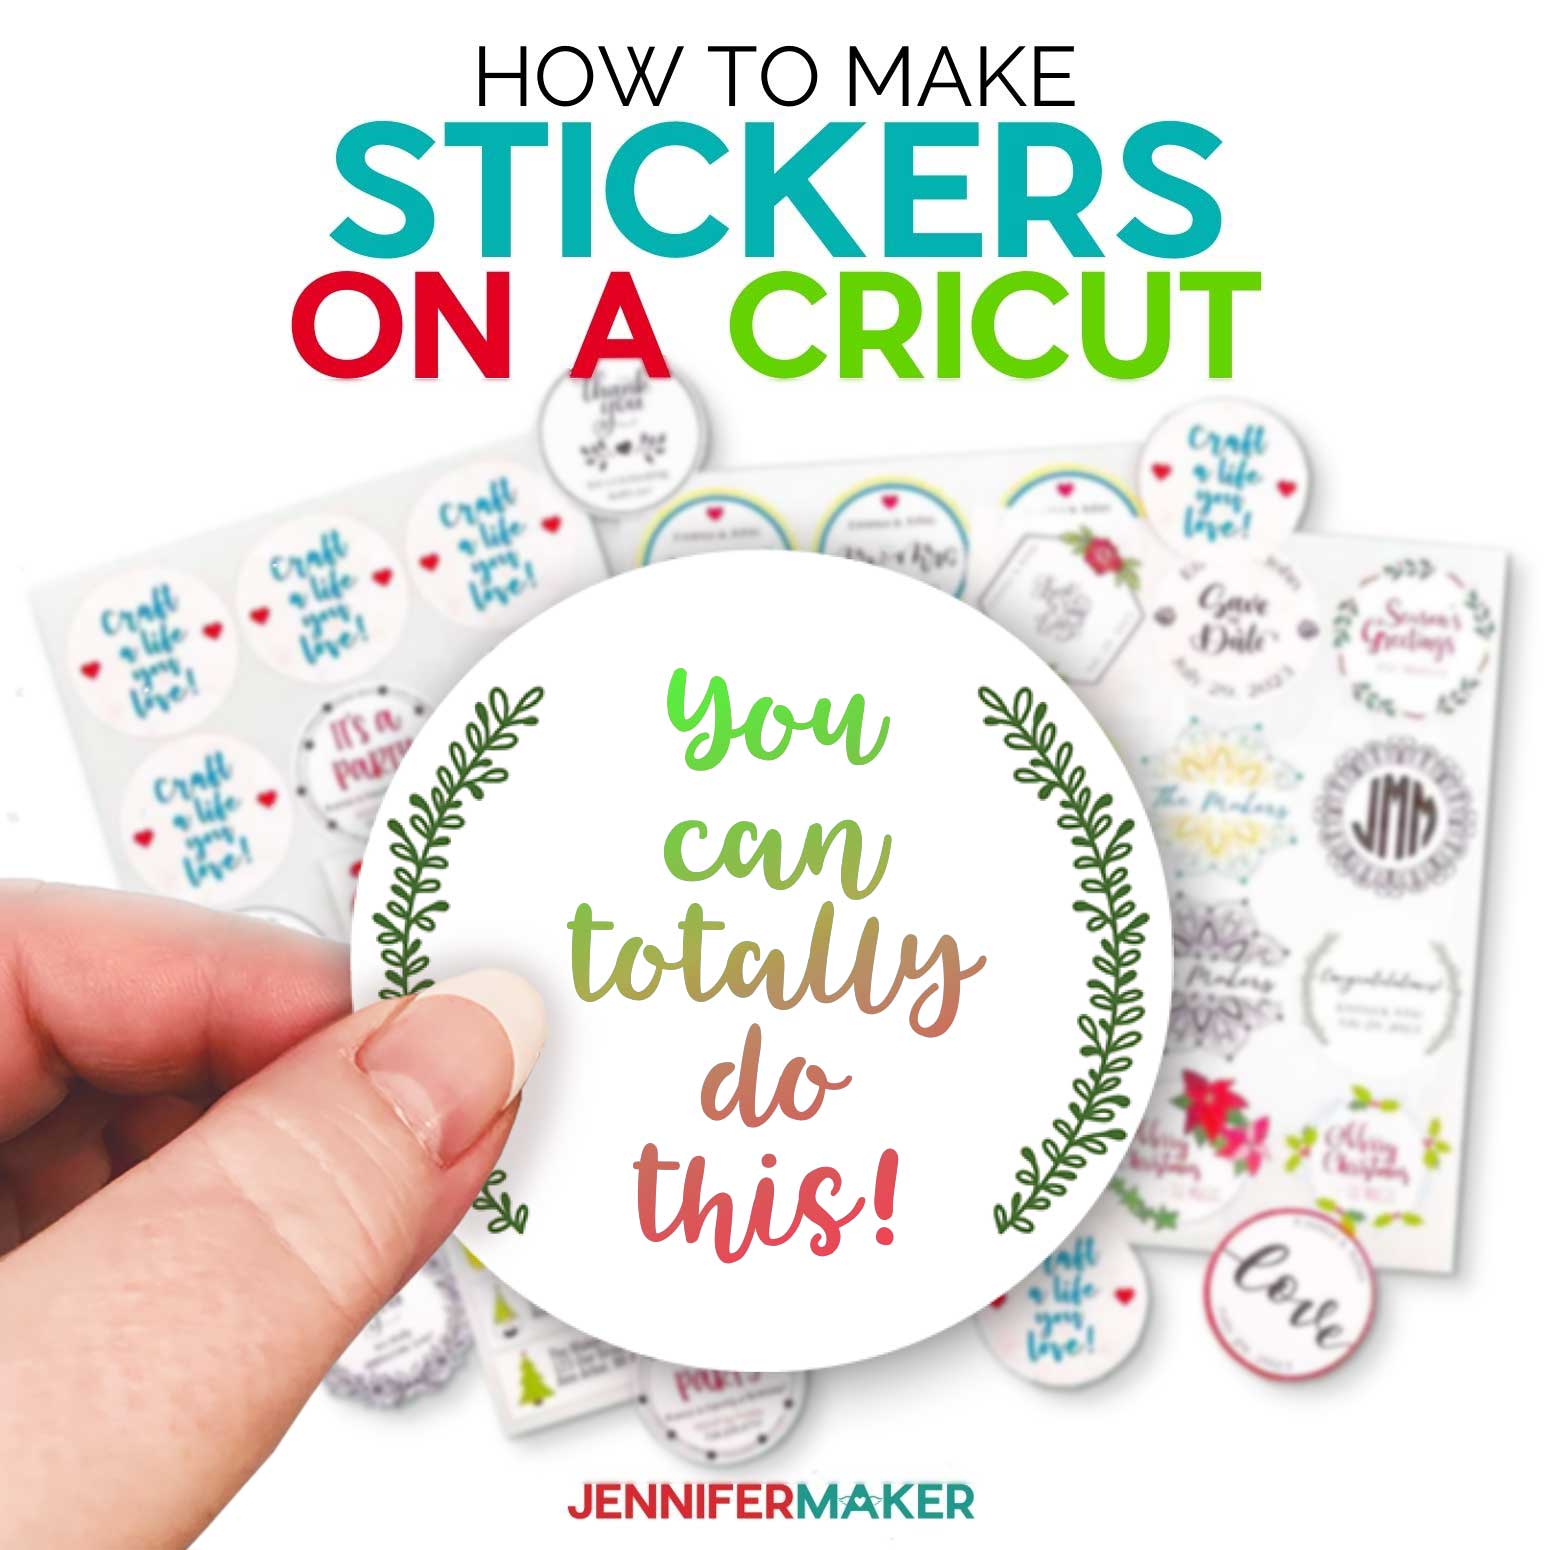
How to Print and Cut Round Stickers on the Cricut - Jennifer ...
How to Make Stickers with Cricut Print + Cut (2022) For more on this print then cut feature check out my post, How to Use Cricut's Print then Cut for Beginners. Step Two: Upload the .png or .jpeg or .svg Files into Cricut Design Space First thing, create an account if you haven't done so. Then, open up Cricut Design Space, and on the Home page choose New Project. This will open up a new canvas.
How to Make Clear Print Then Cut Label Stickers with Cricut ...
Easy Print & Cut Stickers on a Cricut! - Jennifer Maker Click "Make It", click the green "Send to Printer" button, make sure "Bleed" is on, then send your stickers to the printer. I recommend you print on Normal or Best setting if you have that option. Your sticker sheet will print with a black rectangle around them -- this is your Cricut's registration mark and it needs to be there.
A Guide To Making Labels with Cricut Print Then Cut - The ...
How To Use Cricut Print Then Cut / DIY Labels and Stickers In today's video you will see how easy is it to use Cricut's print then cut feature to make labels. I use it today to make some labels for strawberry jam. I also use this feature a lot to make...
How to Make Stickers with your Cricut +Free Sticker Layout ...
Cricut Labels: 3 Ways to Make Them - The Country Chic Cottage Choose both objects and click flatten to make the label a print then cut. Repeat for as many labels as you need. Print when prompted in Cricut Design Space then add to your machine for the cutting. Peel and stick the labels once complete to any surface. Tried this project? tag us to show off your work!
Easy Print & Cut Stickers on a Cricut! - Jennifer Maker
Complete Print Then Cut Cricut Guide - How to Make Stickers and More ... When you want to Print then Cut something using your Cricut machine, it's key to setup the design correctly in Design Space. There are two things that you must make sure you do: You must switch the "Operation" option to "Print then Cut >> Standard" itch setting from "cut" 2. Then you need to click "Flatten" on the bottom right.

How to Make Stickers Using the Cricut Joy |
Cricut Print Then Cut - Tips and Tricks - Shawn Mosch Just click on the box that I circled in blue in the image below to change the color. Now we are going to start to change these from cutting images to print then cut images. First, right next to where you changed the color of the label to white, click on the Fill and change that from No Fill to Print. Once you do that, look at the layers panel ...

Pin on Crafting
Kitchen Labels, How To Print And Cut On Cricut - Extraordinary Chaos A Few Tips For Using Cricut Print And Cut. Decide on the best paper to print on, I prefer printable printable vinyl sheets to sticker paper. Vinyl is thinner and produces a better overall effect. Calibrate your printer before using with you Cricut, this will save so much time and effort. Load your paper the correct way into the printer.

How to Make Stickers with Cricut "Print then Cut" - Sarah Maker
Cricut Print Then Cut Stickers Tutorial | Sweet Red Poppy
How to Make Stickers with your Cricut +Free Sticker Layout ...
How do I Print Then Cut with writing style fonts and images ...
I'm Not a Crafter & Made Spice Labels w/ Cricut Joy Machine ...
A Guide To Making Labels with Cricut Print Then Cut - The ...
How to Make Stickers with Cricut + 4 Ways to Waterproof Them ...
Easy Print & Cut Stickers on a Cricut! - Jennifer Maker

Make STICKERS with Cricut + free sticker sheets - Well ...

How to Make Print then Cut Stickers in Cricut Design Space ...
How to Print then Cut Stickers on Cricut * Moms and Crafters
A Guide To Making Labels with Cricut Print Then Cut - The ...
Make STICKERS with Cricut + free sticker sheets - Well ...

DIY Custom Water Bottle Labels with Cricut Print then Cut.

Cricut Christmas "Santa-tizer" Sanitizer Print then Cut ...

Cricut Hack to Save Paper for Print Then Cut Images · Crafty ...
How To Make Stickers With Cricut (SUPER QUICK + EASY)
How to Make Waterproof Die Cut Stickers on Your Cricut : 7 ...

HOW TO MAKE STICKERS WITH A CRICUT USING PRINT THEN CUT AND ...

How to Make Vinyl Labels with a Cricut Cutting Machine | Abby ...

Cricut Printable Vinyl, White

How to print then cut printable stickers on your Cricut (An ...

Cricut Print Then Cut Stickers Tutorial | Sweet Red Poppy

How to Make Stickers with Cricut "Print then Cut" - Sarah Maker
A Guide To Making Labels with Cricut Print Then Cut - The ...

How To Use The Print And Cut Feature In Cricut Design Space ...

Print Then Cut FAQ's + Free Printable Downloads - Kayla Makes

Print & Cut Label Tutorial in Cricut Design Space - Crafting ...

How to Use Cricut Print then Cut For Beginners - Well Crafted ...
HOW TO MAKE STICKERS WITH A CRICUT USING PRINT THEN CUT AND ...
Post a Comment for "42 how to make print and cut labels on cricut"